How to prepare your nails before applying polygel?
The key to a long-lasting polygel manicure is good nail preparation. If you want your polygel to last for several weeks without any problems, this step is essential. Follow these tips carefully, and you will be ready to apply your polygel like a pro!
Clean and disinfect
Before you begin, wash your hands well to remove any traces of dust, oil or dirt. A clean nail is crucial to ensure good adhesion of the polygel. For added safety, you can also lightly disinfect the surface of the nail with a little alcohol or a specific degreaser.
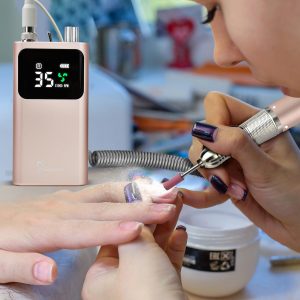
Shape your nails
With an electric nail file, give your natural nails the shape you want: square, rounded, or whatever you like! This step allows you to have a smooth and uniform base before applying the polygel. Make sure your nails are the same length.
Push back your cuticles
Use a wooden stick or a cuticle pusher to clear the base of your nails. It is super important to push back the cuticles so that the polygel does not adhere to the skin, which could cause premature peeling.
File the surface of the nails
Take a nail buffer to lightly file the surface of your natural nails. This removes the shine and creates a slightly rough surface, which will allow the polygel to adhere much better. Do not press too hard, the idea is just to prepare the plate without damaging it.
Degrease your nails
Once your nails are filed, use a degreaser (or 90° alcohol) to clean the surface well. This will remove all the natural oils and ensure a better hold of the polygel.
Apply a Base Coat
The base coat can protect your natural nail and ensures that the polygel adheres well. Apply a thin layer of base coat and pass your nails under the UV/LED lamp for 30 to 60 seconds to harden it.
Read also: The Basics of Resin Nail Care